Wordpress Plugin
A WooCommerce payment gateway for merchants to integrate Tingg express checkout on their Woocommerce checkout page, offering their customers a pan-african variety of payment options.
This offers our streamlined and simplified Tingg-branded payment page with an intuitive payment experience to businesses using WordPress websites to facilitate quick and simple payments for their customers.
Before you proceedYou need to have installed the WooCommerce plugin to proceed with Tingg plugin installation.
NOTE:You can preview the plugin from the official WordPress plugin page.
Pre-requisites - Requirements to get started
| Requirement | Description |
|---|---|
| Configure Services | After successful registration, every business gets a default service |
| Setup payments options | Channels from payment providers through which customers are able to pay |
| Retrieve Keys | API keys are what uniquely identifies your services when integrating with the checkout platform |
Installation
Installation on the WordPress plugin store:
- Login into your WordPress site admin dashboard
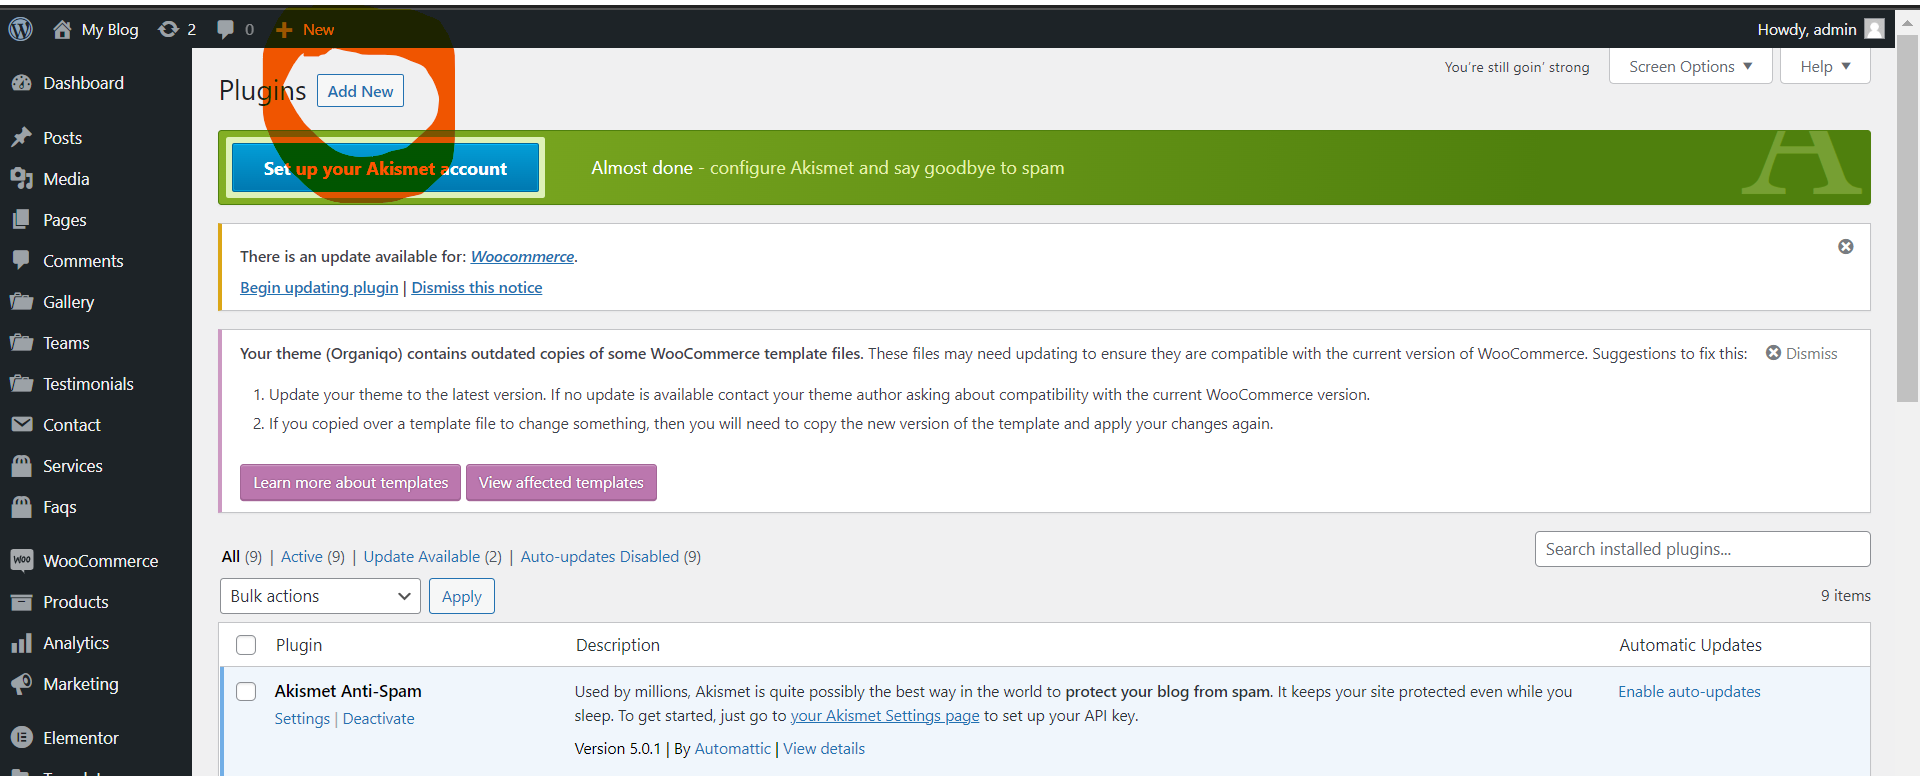
- Go to the plugins page. At the top of the page beside the Plugin title, click on the Add New button.
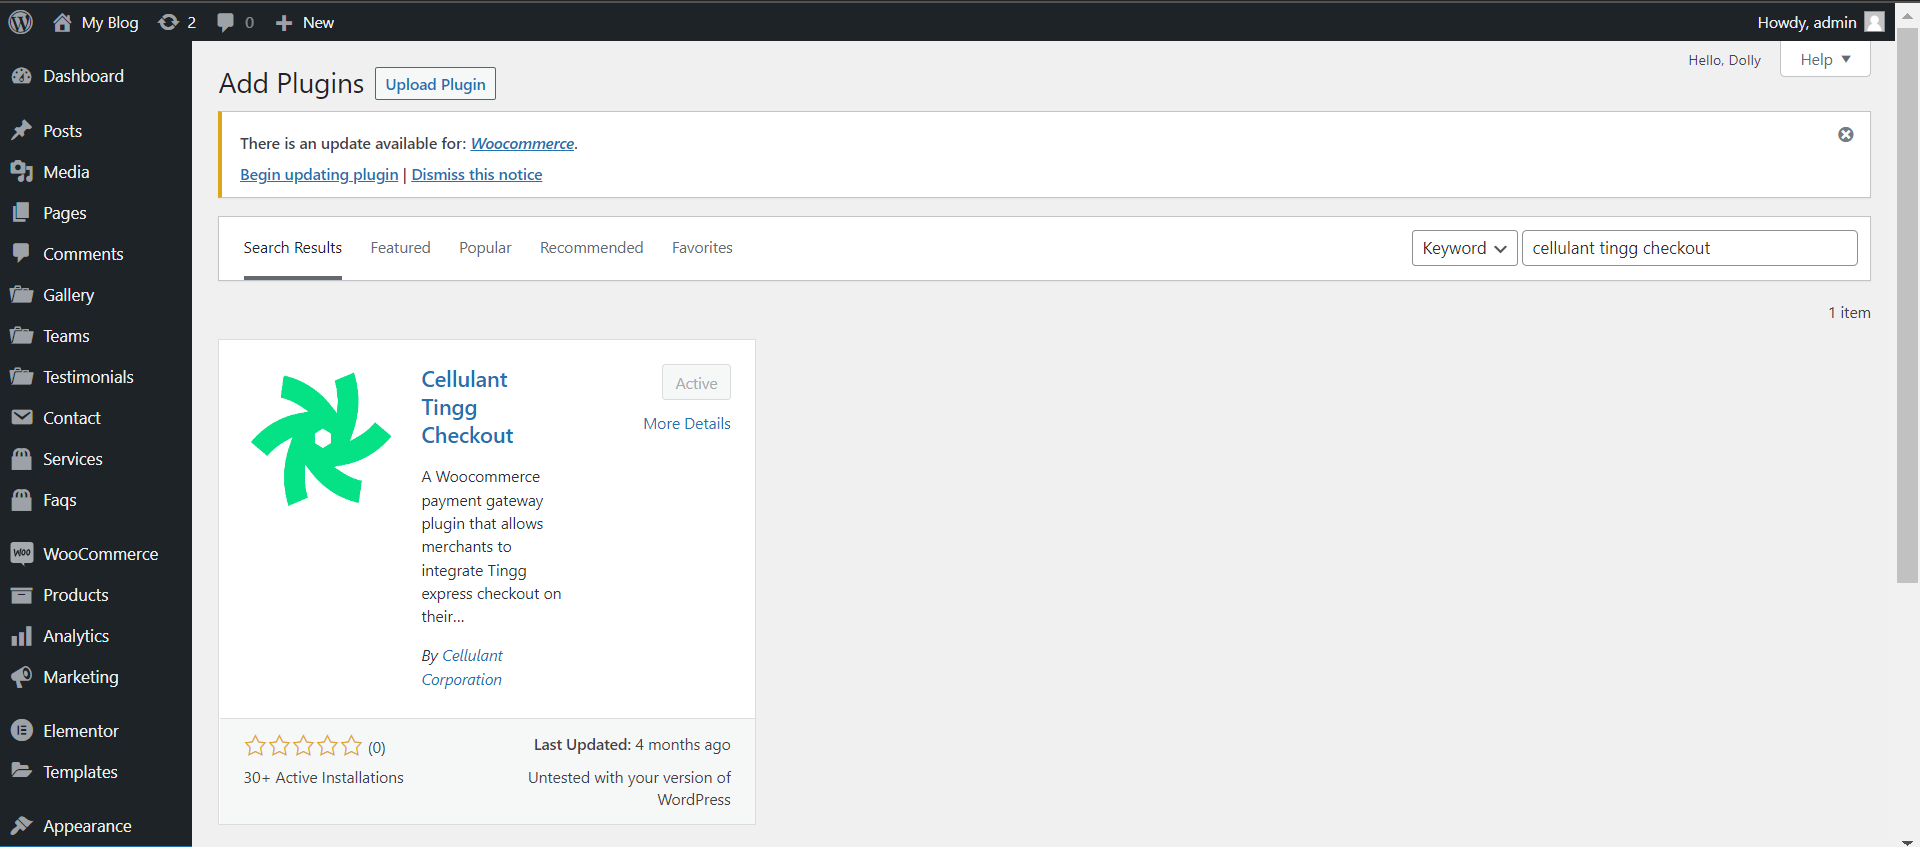
- Search for Cellulant Tingg Checkout and click on
**Install Now**.
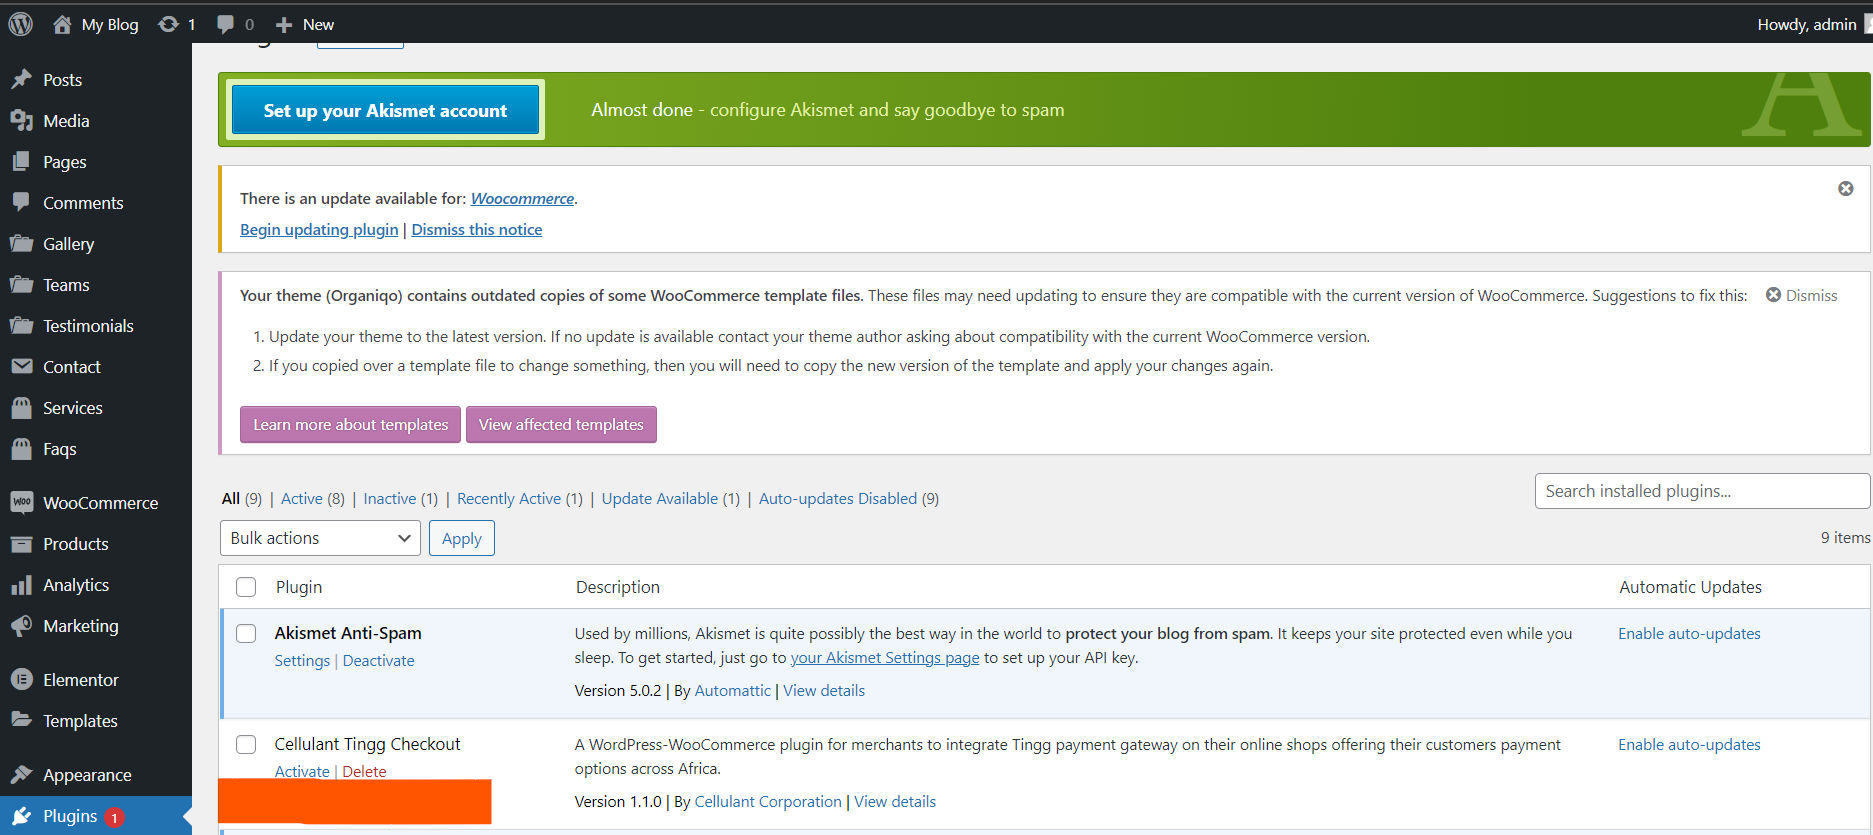
- After Installing, return to the plugins page and
**activate**the plugin.
-
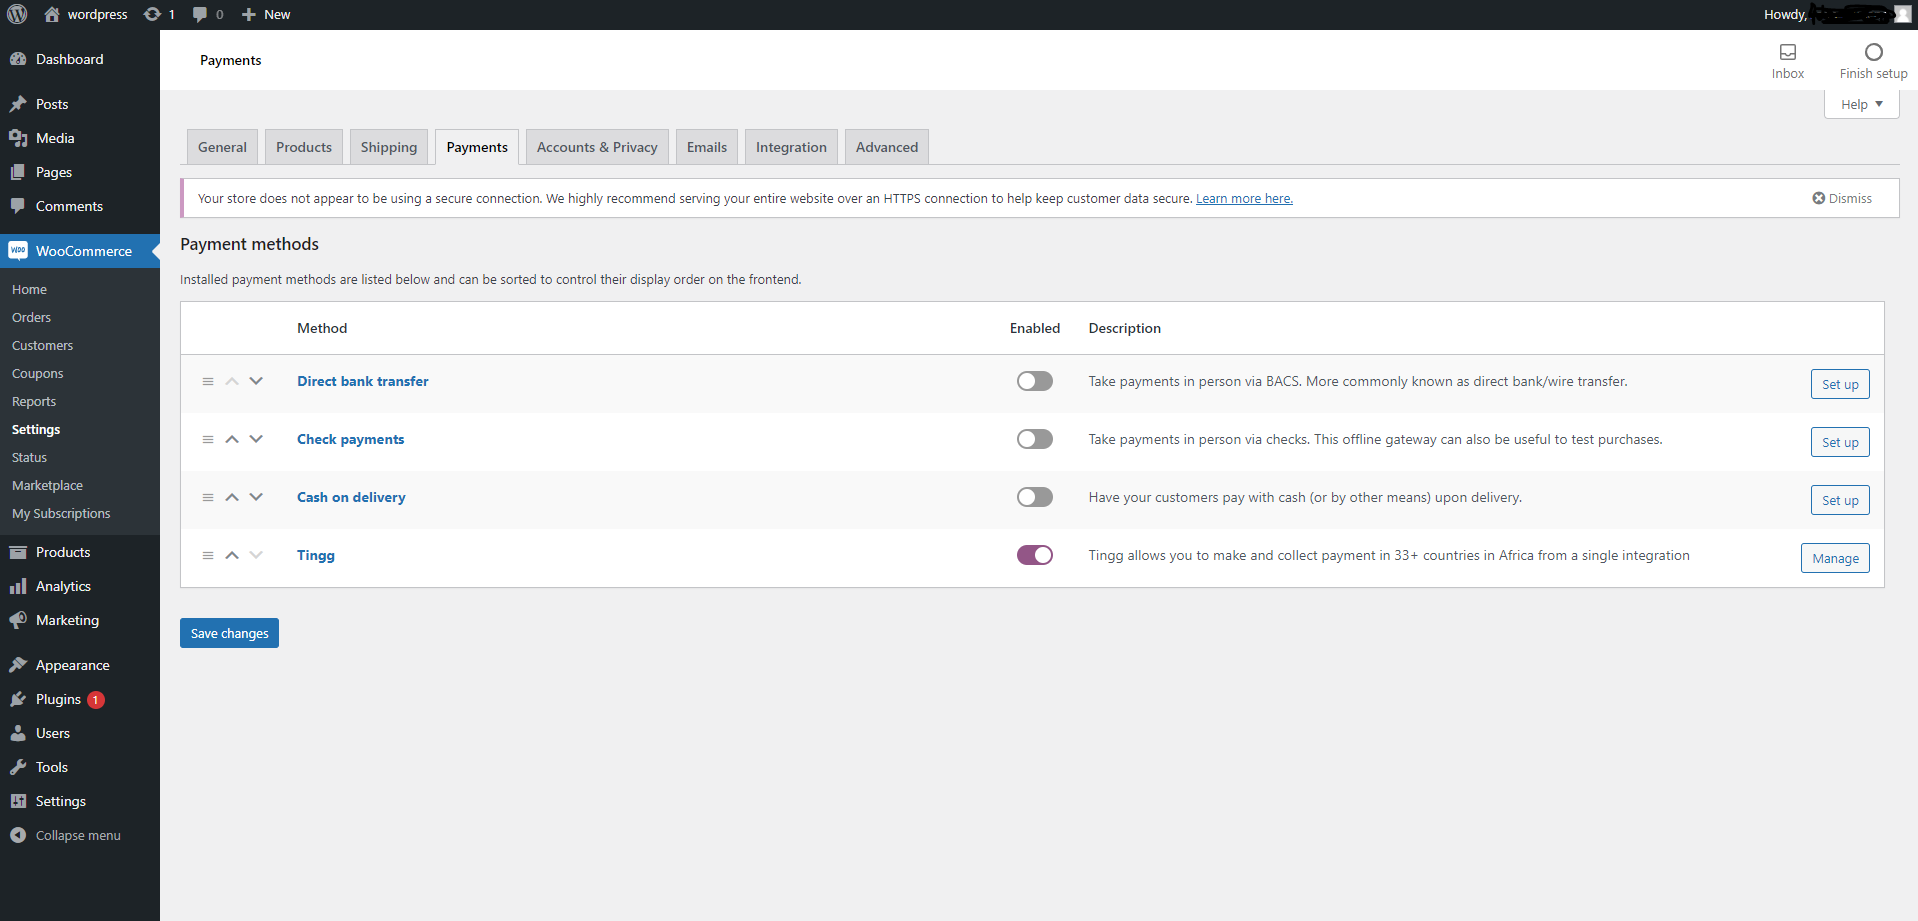
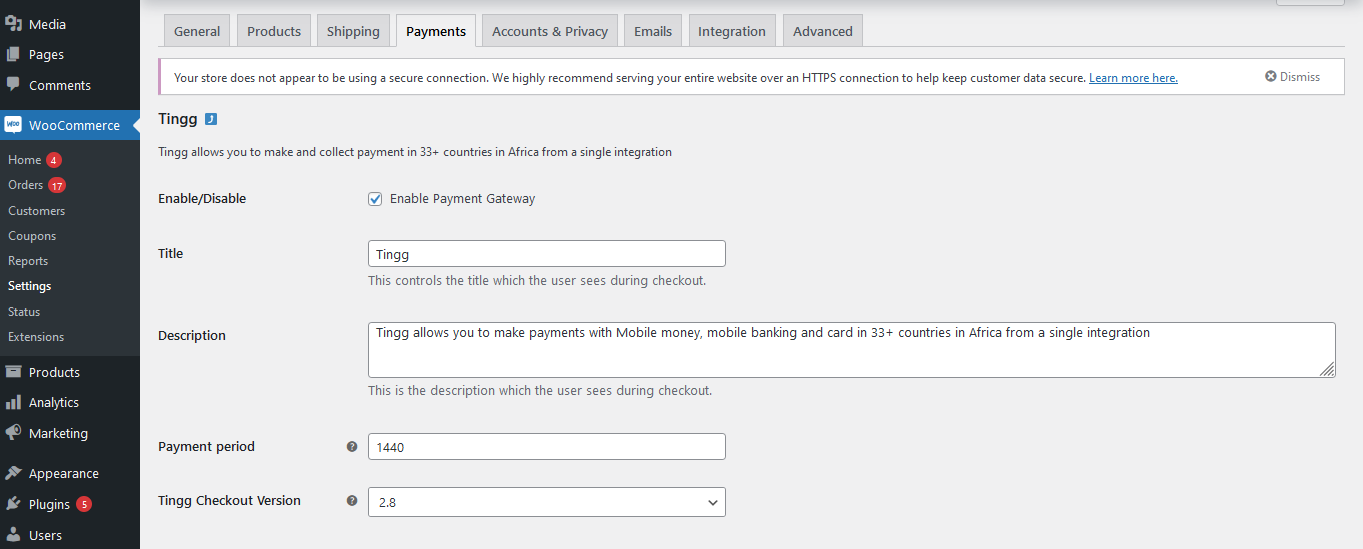
After activating, Click WooCommerce >> Settings, Enable Tingg using the switch button beside tingg description
Once activated, Click on
** Manage**Tingg to edit the configuration parameters.
- Select Tingg
**Checkout Version 3.0**
-
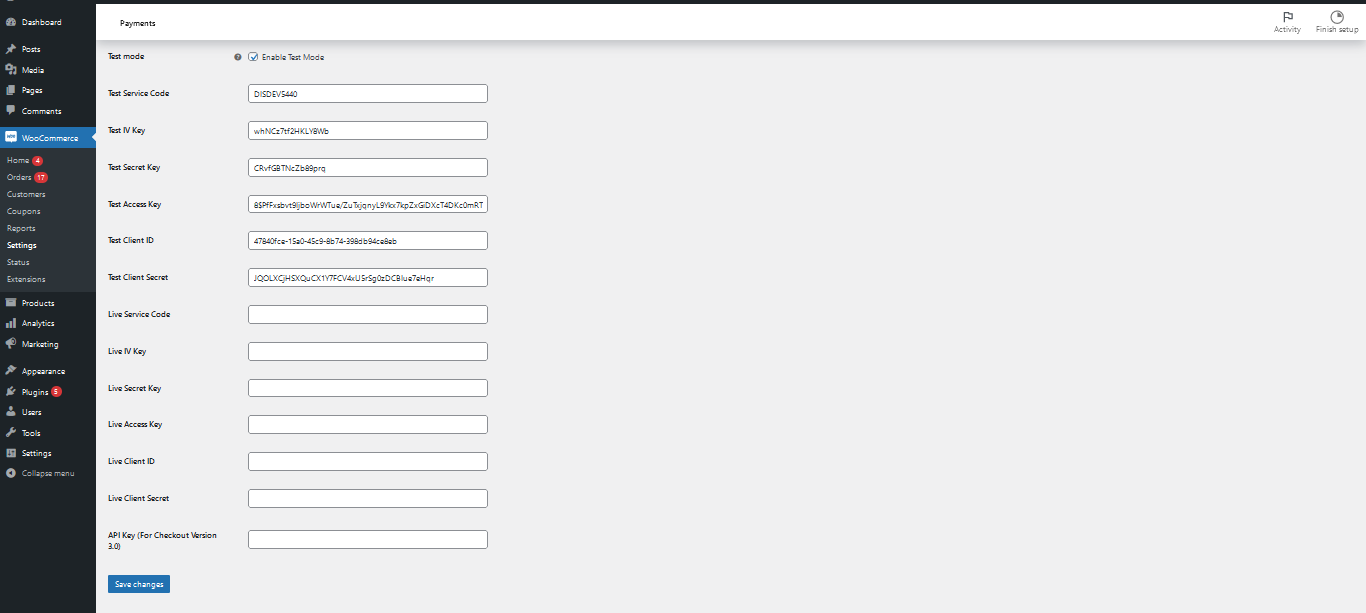
Input the required fields: _Test Service Code, Test IV Key, Test Secret Key, Test Access Key, Test Client ID , Test Client Secret, and API Key. You may find these details on this link.
Once done, Click on
Save Changes.
Updated 12 days ago
