
Set Up Service and Configure Payment Options
How to manage services you create under your business.
Creating your First Service
After your account has been activated, you are required to set up a service, through which you will be collecting funds from your e-commerce store instances. To create a service you need to provide the following:
- Service name: A unique identifier of the online service.
- Payment options: Payment methods that you would want to provide to your customers.
Creating Different ServicesEach service uniquely identifies an e-commerce store. It is advisable to create a service for every online shop that you may have. This ensures you get accurate reporting for your collections.
See the illustration below to quickly set up a service.
1: Choose a service name for your business
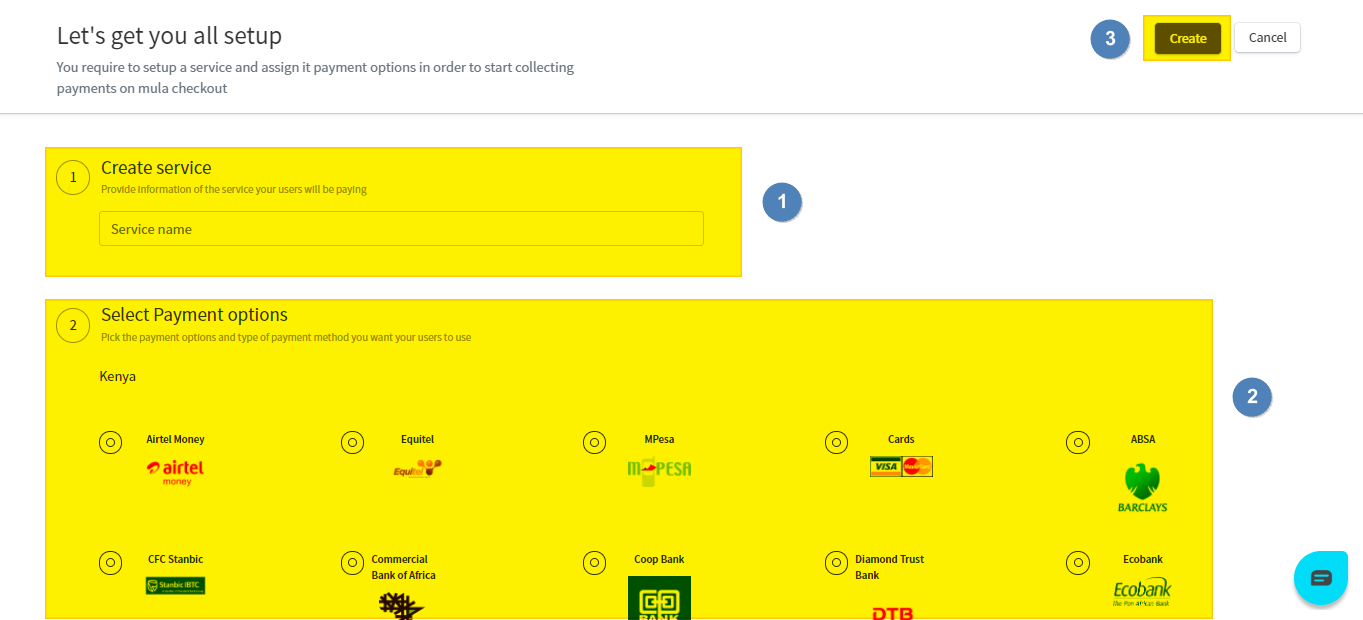
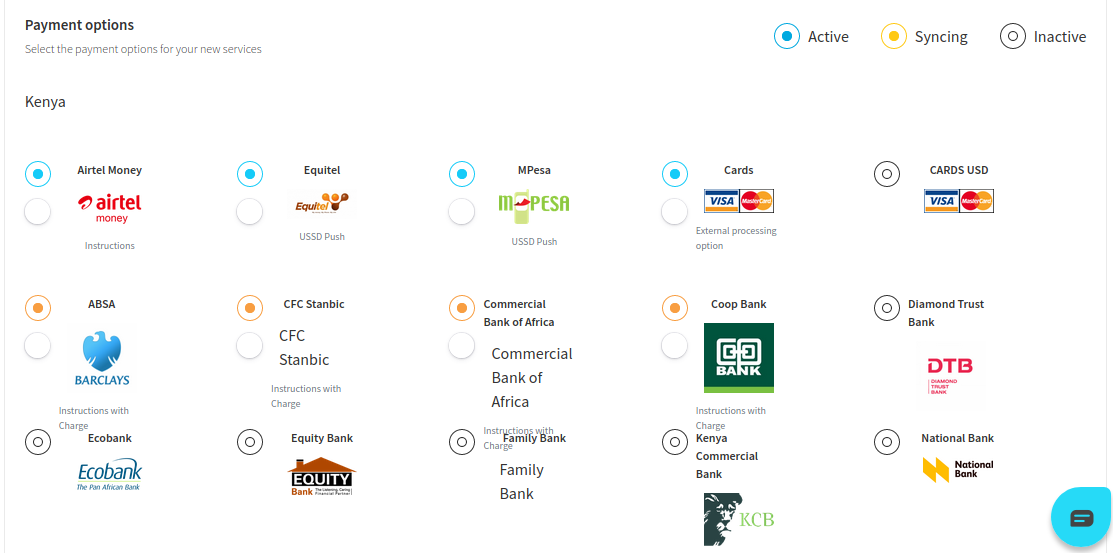
2: Select payment options by clicking on the radio buttons next to the payment option title and image
Once the payment option radio button is selected, it will change color depending on the state of the payment option it is attached to.
An orange/amber radio button indicates that the payment option is being synced to your service.
A blue radio button indicates that the payment option is active and is ready to be used with your service.
3: Click Create once you are done setting up your service name and payment options. Each payment option has an allocation to edit the type of experience you would want to be associated with it. A description of all the payment experiences available can be found here.
Adding Multiple Services
The checkout platform allows multiple services to co-exist under a single business name. Each service will have a unique service code, IV Key, access key, etc. To create another service follow these steps:
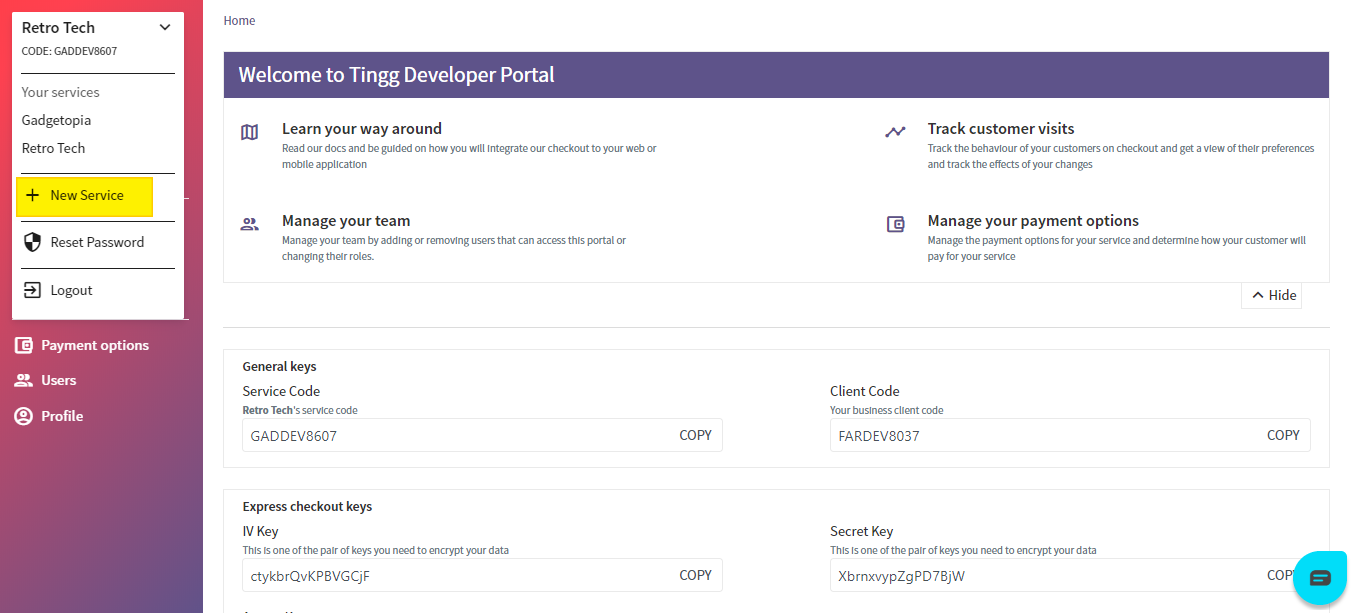
1: On your business home page (You will be able to view this page after creating your first service ), click on the drop-down menu at the top of the panel on the left.
2: From the drop-down menu that opens click on + New Service. See the section highlighted in yellow below.
3: Give your new service a name and select the appropriate payment options by checking the radio buttons.

After you are satisfied with the setup, click on the Create button at the top right-hand side of the page.
Congratulations! You just created a new service and are ready to start collecting customer payments.
Updated about 2 months ago